Table of Contents
Using a spirit level is an essential part of any DIY project, ensuring that the end result looks professional and is structurally sound. Even the amateur handyman knows this much. A spirit level can help you to ensure that surfaces are perfectly horizontal or vertical, which is especially important for tasks such as hanging pictures straight on the wall or building a deck in your backyard.This method was used since ancient times, in different ways, but what we have today makes things rather easy. But, only if you know how to use this tool properly.
According to adafastfix.co.uk, while using spirit levels may seem simple enough at first glance, there are actually quite a few important steps involved to make sure you do it correctly. That’s right. For someone using it for the first time, it might not come so easy as we make it up to sound. In this guide, we’ll go over everything that you need to know about how to use a spirit level properly. So, read carefully, and after a few rereads you will most likely get a grasp on how it functions and what makes it so popular among the handymen of the world. Let’s start with the first step.
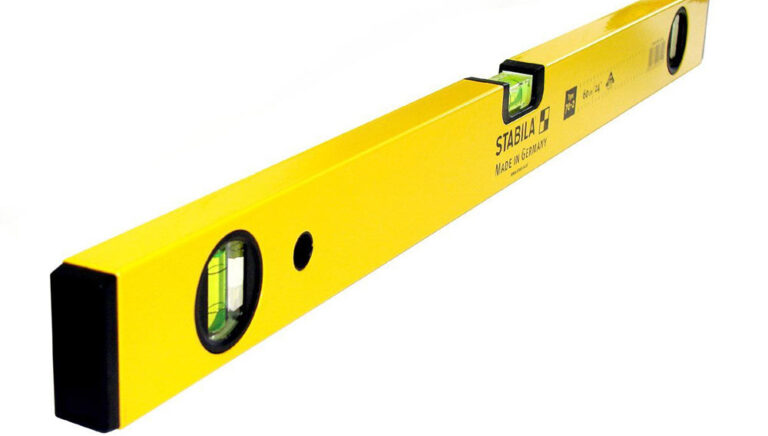
- First, you’ll need to identify the two vials on your spirit level that indicate if a surface is horizontal or vertical. The longer tube will usually be for determining if a surface is horizontal and the shorter one for determining if it’s vertical. Both should have small bubbles inside them – once you’ve identified the correct tubes, you can get started measuring.
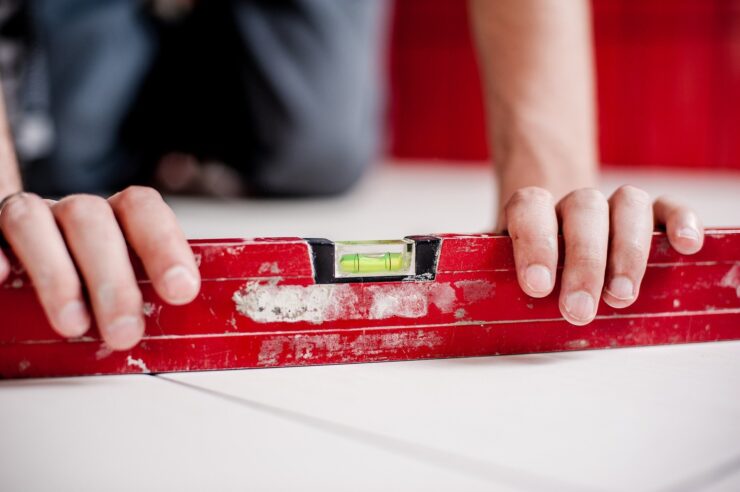
- To check whether a surface is perfectly level, place the spirit level onto the area that you want to measure and make sure that both of the bubbles are positioned in between the two lines on either side of each tube. If this isn’t the case, then make any necessary adjustments until both bubbles sit snugly in between their respective lines.
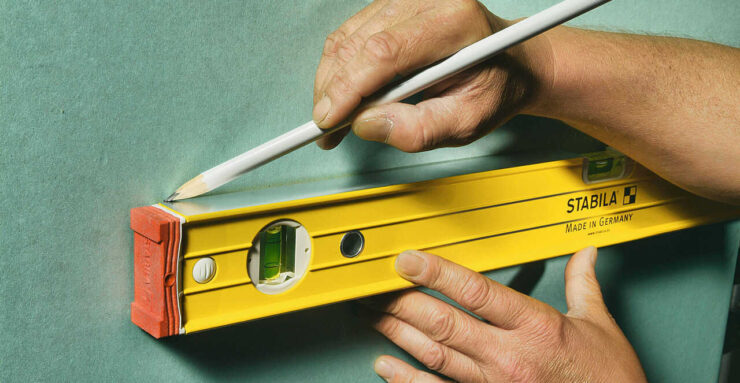
- When you’ve checked that the surface is level, you can mark it with a pencil or marker and make any adjustments if necessary. Make sure to keep checking your work with the spirit level until you’re happy with the results. And once you’re finished, it’s important to remember to store your spirit level in a safe place for future use – preferably away from moisture and direct sunlight.
With these simple steps, using a spirit level can be both quick and easy! Now that you know how to use one properly, you’ll be able to tackle any DIY project with confidence.
How Can I Check if My Spirit Level is Accurate?
To check if your spirit level is accurate, you need to use a reference surface, like a flat wall. Place the level on the surface and observe the bubble in the vial. The bubble should be centred in between the two lines indicating that it is perfectly level. If it is not centred, then your spirit level needs adjustment or replacement depending on how far off the bubble is from being centred. To make adjustments, turn the screws at either end of your spirit level with a screwdriver until the bubble is centred in between both lines.
If after adjusting your spirit level it still does not appear to be accurate, you may want to consider purchasing a new one as continued use of an inaccurate device can give false readings and lead to inaccurate outcomes.
It is also important to take special care when transporting or storing your spirit level to ensure that it remains accurate. Avoid dropping your spirit level and store it in a safe place where there are no vibrations or extreme temperature changes which could cause the liquid inside the vial to expand or contract, affecting the accuracy of the level.
Why is it Called a Spirit Level?
The reason is quite simple. No, it is not because of some of its spiritual properties. It doesn’t have any. The reason is the filling with which it is filled. It can be either pure alcohol or a coloured spirit. As we already said, it is not full end to end, but with some space left inside. This additional space is what creates the bubbles. They are essential for fine measurement. You might be wondering why water isn’t used.
Well, alcohol or coloured spirit are of much lower viscosity. It is this trait they are much more repellent to surface tension compared to water, which ensures that measurements are conducted with more precision and speed. Due to the low level of viscosity and almost no surface tension, the bubble can move fast through the tool and find the right spot quickly which makes the job much easier and with no delays.
The reason why oil or water isn’t used is that they would most likely get stuck to the surface of the glass and make it impossible to see the bubble and be successful with your measures. Also, alcohol is a good choice against freeing. So if you’re working in cold temperatures the chances are less likely that your tool will malfunction. While usually, these liquids are colourless, due to easier visibility they are usually coloured green or yellow.

Types of Spirit Level
There are quite a few types. We’re going to cover only the primary ones. When it comes to the materials of which they’re made, they can be standard aluminium or plastic. They also come made of wood, cast iron, and some other composite materials. Spirit levels are used in various fields and thus they have different types. Those that you’ll most likely encounter first are called carpenter’s level.
The next step is the mason’s level. These are much more professional and longer as they are used at construction sites. After these two types, you have the torpedo level followed by the pocket level. Post, line, and engineer’s levels are what follow each with different precision levels. We could go even deeper but the chances are you won’t be needing more precision from these tools for any DIY project. What we have written above should provide enough insight to help you understand what is a spirit level and how to use it properly. Tell us how it went.