Table of Contents
When it comes to arranging our homes, it can’t be done without furniture. As it is tradition, most of us usually turn to wooden pieces. Wood has been used for furniture since ancient times. Yes, today we have many alternatives but classics remain classic no matter the era we live in. One issue with wooden furniture is that it can easily be damaged. Stains and scratches happen all the time. The piece of furniture that suffers the most are of course the tables. Constant contact with hands, knives, forks and anything else will leave a mark. Some people protect the top surface with glass, but not even glass is the best solution. You can see where we’re going with this. It would seem that all of us found ourselves in a similar situation.
Are you looking for a way to protect your table from scratches, spills and other damage? If so, then making a table protector out of Perspex is an easy and affordable solution. Perspex is a strong yet lightweight plastic that can be easily cut into any shape or size. Plus, it’s transparent so it won’t detract from the beauty of your furniture. In this guide we will show you how to make a table protector out of Perspex in just three simple steps. With the right tools and materials at hand, you’ll have your own custom-made table protector in no time!
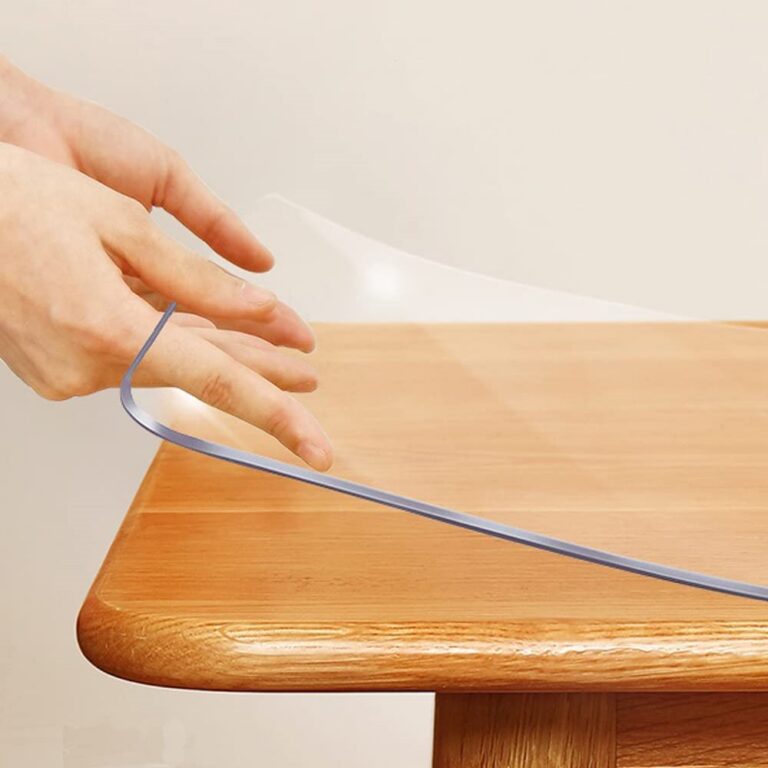
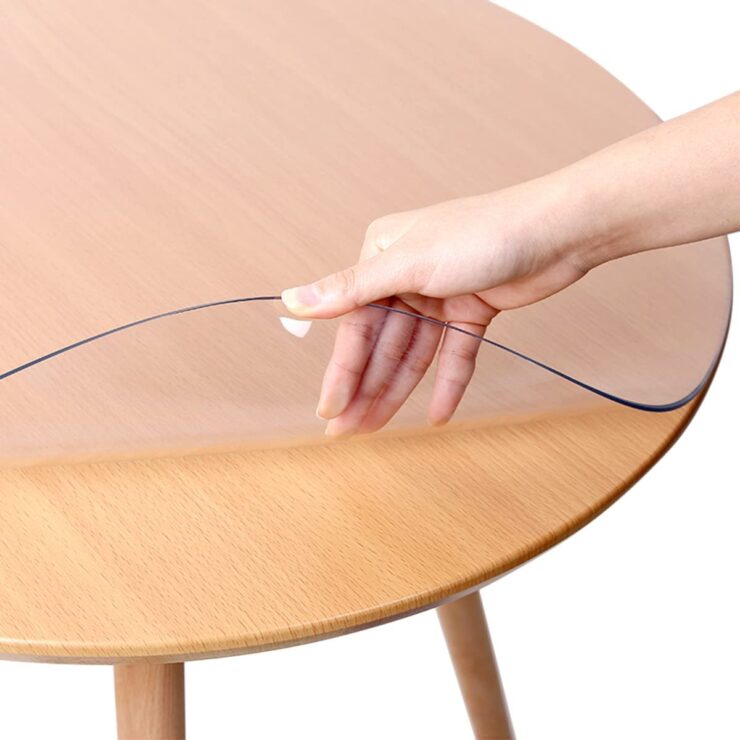
Step 1: Measure and Cut the Perspex
The first step is to measure the dimensions of your table and then use a jigsaw or saw to cut the Perspex into the desired shape, as you can see on simplyplastics.com. To ensure precision, you can draw out the shape on paper first and then trace it onto the Perspex with a marker pen. Keep in mind that you should leave enough room for extra cuts around the edges so that your protector can fit snugly over your table. Also, make sure to wear safety goggles when cutting Perspex.
Is it Easy to Cut and Shape Perspex for my Desired Size and Shape of the Protective Cover?
Yes, it is quite easy to cut and shape perspex for your desired size and shape of a protective cover. It can be achieved by using a saw or router with fine-tooth blades that are specifically designed for cutting acrylic plastic. You can also use a heat gun to heat the perspex sheet and make it easier to bend into the desired shape. The key is to keep the blade’s speed slow and steady while making cuts in order to gain accurate results. If you have any doubts about its ability to achieve your desired outcome, there are specialist companies who offer custom cutting services. They will help you get the perfect table protector out of perspex.
Step 2: Sand Down Edges and Corners
Next, take some sandpaper and gently sand down any sharp edges or corners on your newly-cut protector. This will not only make it look more finished, but it will also make it less likely to cause any damage or injury if someone bumps into it. This is not the part where you want to rush matters. Now that the cutting session is over, you are applying the finishing touches. That’s why you must do everything carefully as there will be no going back. The entire process is not too hard, but it will take time.
So, there’s no point in rushing matters. You should arm yourself with patience instead. Another quite important step is to have the right tools prepared. We’re not talking about hard material, but without proper equipment, you won’t be able to get the job done. The first two things you’re going to be needing are water and waterproof sandpaper. Now that you know that water is going to be one of your primary tools you know that saying no to any electrical tool is a must.
The finishing touch will depend on the type of sandpaper you will be using. So, ensure that you start with a low grit paper and finish with high-end grit paper. Doing finishing touches of sanding with paper should usually do the trick but you can take things even a few notches further. Some of the recommended substances for usage in moments include different types of pastes and waxes that can be your final touch.
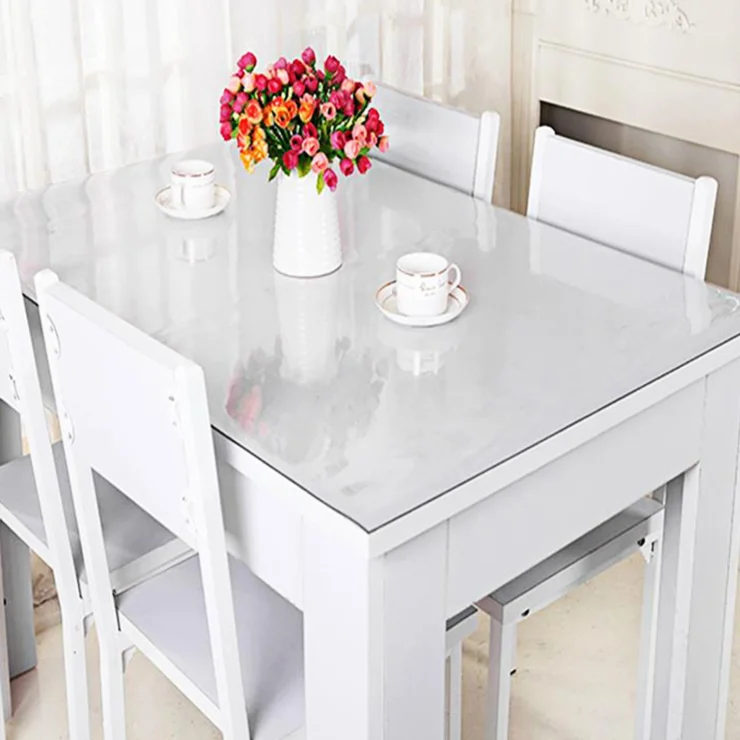
Step 3: Secure the Protector in Place
Finally, you can use double-sided tape or screws (depending on what kind of surface your table is made out of) to securely attach your protector to the top of your table. This decision lies solely on you. It all depends on how much you value your table and the material from which it is made.
If it is plastic you can easily make holes and screw the protector from above. But, if it is wood you might not be too eager to put a dent into your table. In this case, it is better that you use a form of glue suitable for situations like these. Either way, you’ll be satisfied with the end product and the amount of protection you’ll receive. Now you’re ready to start using and enjoying your new table protector!
Are there any Safety Precautions I Should Take When Working with Perspex?
Safety is key when working with Perspex. It is a strong material and can cause injury if handled improperly. Always wear safety glasses, protective gloves, and clothing that covers your arms and legs when cutting or drilling Perspex. The same way you want for Perspex to protect your furniture you need to think about protecting yourself while operating with it.
Never force the tools you’re using; instead use light pressure only to avoid potential accidents. Additionally, use clamps to securely hold Perspex in place while you are cutting or drilling into it as this will minimise any risk of personal injury from shards of plastic flying off in the wrong direction. Also, as we mentioned, when you’re sanding its surface with water ensure that you’re not using any electrical tools, which could lead to a hazardous situation.
Finally, always be aware of sharp edges on your table protector once you have finished creating it; these must be sanded down or covered up with an adhesive edge trim for further protection. Doing so will ensure that your dining table is safe for your family to use. If you fail to do this, you might find yourself in a situation where you don’t need knives to get cuts.
Making a table protector out of Perspex is quick and easy – why not give it a try today? With just three simple steps, you’ll have a custom-made protector that will keep your furniture looking as good as new for years to come.You know it makes sense.